Showing posts with label herbs. Show all posts

Tuesday, 16 April 2013

Vegetarian chickpea burgers.

Flicking through last month's issue of one of my favourite magazines, Healthy Food Guide (issue April 2012), I came across this recipe and I just had to give it a go (page 40).

Since being a vegetarian, I have found it extremely difficult to find nice tasting veggie burgers. In my opinion, Quorn burgers are horrible and I will never touch them again (although I like almost all other Quorn products). I've tried Tesco's meat-free burgers too and they are equally as disgusting. So I have always kept an eye out for an easy-ish looking veggie burger recipe to try and I have finally found one that has taken my fancy (I have tried making my own experimental bean burgers before - blog post here - but they didn't turn out so good.. Bit of a disaster really..).


These chickpea burgers are really delicious. Mine didn't turn out quite as neat looking as the ones photographed in the magazine, but I don't mind... As long as they taste good, that's all that matters. A couple of them burnt a little (although I couldn't taste any burntness) and others crumbled into pieces, but both my family and I really enjoyed them. They felt like the perfect meal to enjoy on a sunny day like today. They'll also be great for barbecues in the Summertime. The burger looks so appetising when assembled with all the garnishes, and it definitely tastes as good as it looks. The lemon and sweet chilli dressing is incredible. If I were to make these again, I'd definitely make two batches of the dressing as I just want to smother everything in it!

This recipe serves 4 people and is approx. 295 kcal per serving with the garnish, but without a roll(I've not included the roll because you may use different rolls as I've used.. Just add on how many calories 1 roll of your choice is worth to the calories above, which will give you an approx. amount per serving with garnish and your roll of choice). The chickpea burgers on their own are approx. 210 kcal each.

Here's how it's made:

Please note: You will need a food processor for this recipe.

Ingredients:

For the burger/dressing:
- 400g sweet potatoes, peeled and chopped
- 2 tbsp sweet chilli sauce
- 1 tbsp fresh lemon juice
- 1 x 400g tin of chickpeas, drained and rinsed
- 2 spring onions, finely chopped
- 1 tsp ground cumin
- 1/4 tsp dried crushed chilli flakes
- 1 tsp lemon zest
- 2 eggs, beaten
- 2 tbsp flatleaf parsley, chopped
- Low-kcal cooking oil spray

For the garnish:
- 4 x rolls, halved and toasted, if you wish (You can choose whatever rolls you'd prefer. E.g. sourdough, pita bread, wholemeal, soft white, etc. I chose "Warburton's Sandwich Thins" for our burgers, which are 100kcal per Thin).
- 100g spinach
- 1 large tomato, sliced
- 1 small avocado, sliced
- 50g reduced-fat feta/salad cheese, crumbled

Method:


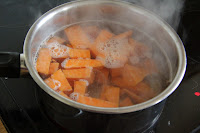
1. Cook the sweet potatoes in a large pan of boiling water for about 8 minutes, or until very tender. Meanwhile, in a small bowl, combine the sweet chilli sauce and lemon juice to create the dressing and set aside.


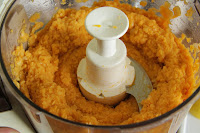
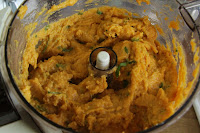
2. Drain the potatoes, then whiz in a food processor with the chickpeas until roughly crushed. Add the spring onions, cumin, chilli flakes and zest and whiz to combine. Gently stir in the eggs and parsley, then divide the mixture into 4 x 10cm patties.


3. Heat a little low-kcal cooking oil spray in a frying pan, then cook the patties over a medium heat for 2-3 minutes on each side until golden and cooked. (Don't worry too much if they fall apart like mine did - they'll be a bit messy but they'll taste just as good).

4. To serve, top the bottom half of each roll with spinach leaves, a chickpea burger, tomato and avocado slices, then the feta/salad cheese. Drizzle over the lemon and sweet chilli dressing, then add the roll tops.

Enjoy! :D

Sunday, 10 March 2013

Tiger prawn Thai green curry.

I originally cooked this dish for my boyfriend, as part of a three course meal. As of March 4th this year we have been together for two years! This dish was the main course, and I made garlic and rosemary foceccia bread with dipping oil for the starter and I made blondies for dessert. It was all so delicious, but this curry was my favourite out of the three. When I made I before, I was following a recipe I found online. Although it was very tasty, it ended up being quite calorific. But I knew I really wanted to make it again, so I took it upon myself to create the same dish with just as much flavour, but with fewer calories, and I've done it. This dish tastes beautiful - better than any Indian dish I've ever tried at a restaurant. It tastes sweet, with subtle heat which isn't too overwhelming and has a citrusy kick from the lime and coriander. I've used jumbo tiger prawns in my recipe as they're pretty meaty and have a lovely texture. But if you're not into those, you can always use some little prawns, a meat such as chicken or even some Quorn or tofu for vegetarians. Just replace the jumbo tiger prawns with whatever you'd prefer and do everything in the same order (if using a raw fish/meat, please make sure it's cooked right through before serving).

This recipe serves 1 and contains approx. 473 kcal.

Ingredients:
- 3 raw jumbo tiger prawns, unshelled
- 1.5tbsp Thai green curry paste
- 100ml reduced-fat coconut milk
- 1tbsp clear honey
- juice of half a lime
- small handful of coriander, chopped
- 50g (uncooked) wholegrain basmati rice
- red chilli, thinly sliced, to garnish (optional)

Method:
1. In a bowl (or, if big enough, use the jug you measured the coconut milk in) place in the coconut milk, honey, curry paste and lime juice, and mix it all together well.

2. Place the raw prawns into a small shallow bowl. Pour over the curry paste sauce mixture, and make sure it covers them completely. Leave to soak for 15 minutes.

3. Meanwhile, get a small saucepan, fill it with about 500ml water and place it on a high heat. Bring the water to boil. Place in the uncooked rice and turn the heat down to medium. Leave to cook for about 25 minutes, stirring occasionally.


4. Once the prawns have finished soaking in the sauce, pour it all into a saucepan and place it on a medium heat. Allow to simmer for about 15 minutes, until the prawns are cooked through (they will turn from grey to bright pink) and the sauce has thickened slightly. Now stir in the coriander, and turn the heat off.

5. Once the rice has cooked, drain it and place on a hot plate. Then pour on the cooked prawns and thickened sauce, either beside or over the top of the rice. If using, place some very thin slices of chilli on top for some fancy-looking garnish.

Thursday, 13 September 2012

Quorn spaghetti bolognese.

I would say that spaghetti bolognese is one of the most popular dishes to have at home - we have it about once a week in our house! It's filling, tasty and can be made to suit you. Some like it cheesy, some like it chunky and some even like throwing in some meatballs to the mix! You can customise it pretty much to however you want. Weirdly enough, before I was a "vegetarian" (yes, I know I eat fish, but I completely avoid meat), I never use to like spaghetti bolognese. But when I found the meat substitute, "Quorn", I actually started to like it. Just because you're a vegetarian doesn't mean you have to miss out on a meal as amazing as this! Just replace the beef mince with Quorn mince, or the meatballs with Quorn meatballs and you can enjoy it too! In my opinion Quorn is far more tasty than meat anyway.. And a lot healthier too! So here it is, homemade Quorn spaghetti:

This little dish was actually something my sister put together (I did ask if it was okay to put it on my blog - she said yeah), but I really want to share it with you guys! It was so nice that I couldn't help but tuck into it a little before taking a photograph.. Oops!

This recipe serves 4 and has approx. 415kcal per serving (without any cheese).

Ingredients:
- 300g dried spaghetti pasta
- 300g Quorn mince
- 2 tbsp tomato purée
- 400g tinned chopped tomatoes
- 400g passata
- 1 vegetable stock cube
- pinch of salt and freshly ground pepper
- 15g HP brown sauce
- 1.5 tsp dried mixed herbs
- 1.5 tsp dried onion granules
- 1.5 tsp dried chopped garlic
- low-fat cheese, grated (optional)

Method:
1. Fill a large saucepan, about three-quarters full, with water and a tiny pinch of salt and place on a high heat. Bring it to a fierce boil. Once boiling, add in the dried spaghetti pasta. Leave the pasta to cook (approx. 10-15 minutes), but remember to stir it occasionally so it doesn't all stick together.
2. Meanwhile, in another medium-large saucepan, placed on a medium heat, add in the Quorn mince, passata, chopped tomatoes and tomato purée. Cook for a minute or two, continually stirring. Then add in the HP brown sauce, vegetable stock cube, salt, pepper, onion granules and chopped garlic. Give it a good stir so it's all mixed together nicely. Then turn the heat down a little and let it simmer for about 10 minutes, stirring a few times, until it reduces and thickens to your preferred consistency.
4. Once you think the pasta is cooked (either taste a bit to check or get a piece of the spaghetti and throw it at a wall - sounds bonkers, I know.. If the spaghetti sticks to the wall it's supposedly cooked) take it off the heat and use a colander to drain it. Evenly dish out the cooked spaghetti pasta between 4 plates. Then take the Quorn/tomato mixture off the heat and also dish it out evenly between the 4 plates.
5. If you like your spaghetti cheesy, grate about 10g of your preferred cheese on top of each dish. Make sure you do it straight away so the cheese melts! Use whichever cheese you like (although low-fat cheese is better for you calorie-wise)!

P.S. To jazz this recipe up a little, you could swap the Quorn mince for Quorn meatballs (adding them in at the same time you would the mince) or you could add in some chunky vegetables to give the dish a bit more texture, such as carrot, mushrooms, onion, whatever you fancy really (add these in at the same time as the sauce, stock & seasonings). Enjoy!


(Above: Quorn spaghetti bolognese, made with Quorn meatballs, instead of mince, and an extra 10g of low-fat cheddar cheese - approx. 514kcal).

Thursday, 30 August 2012

Seafood and dill omelette.

Here is another lovely recipe I found in an old Slimming World recipe book of mine. I was flicking through it last night and spotted this. So I popped to the supermarket today and bought the ingredients so I could make it for myself for lunch. The original recipe serves 4, but I altered the recipe so it just serves 1. It originally includes Worcestershire sauce but I didn't include it as I don't have the money to buy a whole bottle of it, just to use 1/2 a tbsp of it.. Also the dill is suppose to be fresh, but I use dried dill as I use it quite often and fresh dill, although it tastes better, seems to go off too quickly for my liking. I purchased my raw seafood from the fish counter at the supermarket - it was pretty cheap.. Cheaper than I was expecting anyway (£1.44 for 120g). The dish, as made below - which serves 1, is approx. 264kcal! Filling and delicious - great for all you seafood lovers. ;)

Ingredients:
- 120g mixed seafood/fish pie mix
- lemon juice
- 15g red onion, chopped
- 2 spring onions, thinly sliced
- salt and freshly ground pepper
- 1 whole egg and 2 egg whites
- sprinkle of dill
- fry light


Method:


1. Unless it's already cooked, season the seafood and fry with frylight until cooked through. Then place the seafood in a bowl with the lemon juice, spring onions and red onion, and toss to mix well.


2. Place the 1 whole egg and 2 egg whites into a bowl and lightly beat. Sprinkle in the dill and season. Spray a frying pan with fry light and place over a medium heat. Pour in the eggs and swirl to evenly coat the pan.


3. Sprinkle the seafood mixture onto the surface and reduce the heat. Cover and cook gently for 8-10 minutes or until the omelette is just set and the base is golden.


4. Remove from the heat and serve immediately with some salad. Enjoy! ;)


P.S. Don't let your masterpiece end up like mine.. Please remember to turn the heat down and cover, as I completely forgot that step and mine ended up crumbling into a million pieces when I tried to pick it up, haha. Still tasted great but would have probably been a bit more moist and flavoursome and would've looked a lot more appetising all in one piece.

Tuesday, 28 August 2012

Creamy stuffed conchiglie.


This is a gorgeous dish that I found the recipe for in an old Slimming World recipe book of mine. Since I first bought this book I've always wanted to try this recipe, but I never actually got 'round to doing anything. So I thought it was about time I did! I have altered the recipe a bit for the purpose of making it more calorie-friendly. This recipe originally served 4 people, but the way I made it serves 3. Also the original recipe included bacon, but I used salmon for my Mum and I, and lean ham for my sister. There was 3 clean plates after this meal and I got compliments on it for being so tasty, filling and well presented - by using 6 pasta shells pointing to the center, it can be made to look like petals on a flower. I definitely want to make this meal again! Please give this recipe a bash, it's absolutely delicious - a must-try!

The meal made with the recipe below serves 3 and, without the salmon is 332kcal per serving and with the salmon is 427kcal per serving.


Ingredients:
- 18 dried giant pasta shells
- 125g spinach
- 176g extra light Philidelphia
- 1 tsp dried mixed herbs
- salt and freshly ground black pepper
- 30g lighter Cathedral City cheddar cheese
- 114g salmon
- fry light
- 1 medium onion, finely chopped
- 1 garlic clove, crushed
- 213g passata


Method:
1. Cook the pasta shells according to the packet instructions, about 8-10 minutes, then drain and leave to cool. Cook the salmon on the grill with fry light, making sure it's cooked right through. Set aside. When cool, flake the salmon and place into a bowl. (Alternatively you can use other meat/fish/vegetarian filling other than salmon. My sister had ham with hers, as she isn't a fish lover. I just chopped the pre-cooked ham up into small pieces and placed into a bowl).
2. Wash and dry the spinach leaves and place in a large pan over a low heat. Cover and cook, shaking the pan occasionally, for 2-3 minutes, until the leave wilt and turn bright green. Drain in a colander, pressing down with a saucer to squeeze out any water. Chop the spinach and add to the salmon.
3. Stir in the Philidelphia and herbs and season to taste. Spoon the salmon and spinach mixture into the pasta shells and sprinkle the cheese over the top. Place under a preheated grill for 3 minutes or until lightly browned and heated through.
4. To make the tomato sauce; spray a saucepan with Fry Light, add the onion and garlic and cook for approximately 8-10 minutes until golden. Stir in the passata and simmer for 10 minutes. To serve, divide the sauce between three plates and place the pasta shells on top.

Monday, 6 August 2012

Grilled summer fruit with hazelnuts.


Today, after Sunday dinner, I made a dessert for all the family. I made 'grilled summer fruit with hazelnuts' - it was sweet and very delicious! So fruity and fresh and there were 5 clear plates afterwards! I found this recipe in the magazine, 'Healthy Food Guide', the Summer 2012 issue (page 69). This recipe serves 4 (although I made it serve 5 easily). In the magazine it says it's 142 kcal per serving, if serving it between 4 people.. But I tried working it out as if you were serving it between 5, and I made it to be approx. 89 kcal. So it depends how many people you're serving it to, depends on the calories! The magazine's really good - I'm definitely buying the next issue! It's packed full of recipes, articles and advice! It also lets you know each recipes' nutritional information.. It says that this recipe is low-kcal, low-fat, low-saturates, low-salt, vegetarian friendly, gluten-free and two of your 5-a-day! :)

 Here's the recipe, if you want to give it a go:


Ingredients:
- cooking oil spray
- 4 peaches, stoned and quartered
- 250g strawberries, halved, or quartered if large
- 2 tsp vanilla extract
- 1 tbsp caster sugar
- 20g toasted hazelnuts, finely chopped
- 2 tbsp mint leaves, finely chopped
- 150g low-fat vanilla yoghurt to serve

Method:
1. Preheat the grill to medium-high. Spray a medium ovenproof dish with a little oil and put the peaches and strawberries in the dish. Drizzle the fruit with the vanilla extract and sprinkle with the sugar.
2. Put the dish under the grill for 5-8 min until the fruit colours and the syrup is bubbling.
3. Sprinkle the hazelnuts and mint leaves over the top and serve with the yoghurt.


Saturday, 9 June 2012

Fennel and halloumi salad.

Here is a recipe I have found in my new magazine, Body Fit. I saw the photo in the mag and it looked soooo good. I rarely try recipes in magazines any more, so I thought I'd try a few from this to get back into it. This recipe is called 'Fennel and Halloumi Salad'. As soon as I read the word 'halloumi' I knew I just had to try this, because I absolutely adore halloumi! This recipe serves 2 people. I did alter the recipe slightly.. I used only 100g of fennel, 1 tbsp of olive oil and only 30g of dried cranberries.. But I only altered it because that's all I had of each thing. My altered way of making this makes each serving approx. 260 kcal. This salad is literally sooo nice that I ate it for lunch and the other half for dinner! I am definitely going to be making this again soon!

What you need:
- 150g fennel
- 1/2 lemon, juice only
- 2 tbsp olive oil
- 100g halloumi cheese, cut into small dice
- 1 small garlic clove, grated
- 50g dried cranberries, soaked in warm water for 20 minutes and drained
- 15g dill, chopped

Method:
1. Finely slice the fennel into a serving bowl and toss it in the lemon juice.
2. Place a frying pan over a high heat, drizzle in the olive oil, then reduce the heat to medium. Add the diced halloumi and cook for about two minutes on each side, until golden.
3. Add the garlic to the fennel and stir. Next, add in the cranberries and dill. Mix well and top with the warm halloumi.

***This is NOT my recipe. I did not create this. I have copied this recipe directly from page 55 in Body Fit's magazine (July 2012 issue).***

Please please please try this recipe - it is delicious and so refreshing! Definitely a favourite!

Also, there are more recipes I'll be trying out soon - hopefully this week! I have at least 3 more I'm desperate to make. So keep your eyes peeled for them! ;)

Wednesday, 2 May 2012

Herbs - update!

I told you that I'd let you all know when they start popping up, so here's the herb update!

I didn't even know that they had started growing! My mum came to my room telling me she has to take their lids off as one of them was pushing up against it. I had no idea, as about 3 days before she told me, I watered them and absolutely none of the pots had anything growing in them at all. They're growing so fast! Especially the coriander. They're not edible yet though, but even if they were I want to leave them until they get really big and full. So proud of myself for actually being able to grow something! Normally any plants I buy, that grow, die within the first 2 weeks.. So I guess this is a personal achievement, haha.

I'll give an update one these again when they're even bigger!

Monday, 16 April 2012

Discovering my green thumb!

Whilst doing the weekly shopping, with my mum and sister, I spotted these awesome things - Sutton's seeds "Grow Your Own" pots. (Click the photos to enlarge them). They were very cheap - just under £1 each - they're on special offer at the moment. They are pots that contain compost and the seeds to grown your own herbs and vegetables.

We bought 3 pots - parsley, coriander and chives. I've just been sat downstairs "sowing" the seeds. I've never grown my own plants before. I've always wanted to learn to do gardening properly.. I want to be able to grow some pretty flowers in our back garden - even though I know the dog will destroy them.. But I can't seem to even be able to keep plants that are already grown and potted alive for longer than 2 weeks! So this may be a challenge for me.

The pots are really easy to do! All you have to do is move the compost around to loosen it, take a bit of compost out, make a hole and sprinkle the seeds in. Then put the compost back in to cover the hole, push it down to compress it slightly, water it and shove the lid back on. And hey-presto, you've done it. Put them in a window sill and hope for the best. Normally my main problem is remembering to water them.. I'm not even sure how often I'm suppose to water them but oh well, haha!

Wish me luck! I'll take a couple of progress photos, as/if they start to grow! *fingers crossed they do*

Saturday, 14 April 2012

Lemon herb egg salad.


Today I made a Lemon Herb Egg Salad! I found the recipe on the blog 'Budget Bytes'. I did pretty much everything to the recipe, except I only used the egg whites. I chucked the eggs yolks away. This means the egg salad is a lot less calories! It makes 4 servings, and it's approx. 54 kcal per serving (that's only if it's made without the yolks in).

I found the mustard in the egg salad was a little over powering though.. It says to use 1 tbsp of dijon mustard, but next time I'll probably only about 1 tsp or maybe even half a tsp, because the dijon mustard is just so strong.

I've finally found some tasty low-kcal bread! I never ever eat sandwiches/toast/toasties/etc. because of how many calories there are in just one normal slice of bread (which is about 100+ kcal).. But 'Warburtons Weight Watchers White Danish' is only 50 kcal per slice! So I can now start enjoying bread again without feeling guilty.

I put one serving of the lemon herb egg salad into a small sandwich with some organic spinach! It was delicious! The sandwich - made with 2 pieces of bread, raw organic spinach and the egg salad - was only approx. 157 kcal! So very healthy and well within my calorie allowance for the day! Yay!