Showing posts with label recipe. Show all posts

Friday, 2 May 2014

Homemade Quorn paella.

Hello to all my lovely readers. I'm sorry for the lack of posts. Since my last post, I haven't really gotten any better with my health or weight. My weight is still slowly, but surely, going up, no matter how hard I try, which is pretty depressing. :( This is mainly why I haven't posted as much. I don't want to just post about how bad everything is and how bigger I've gotten, but I am mentioning it now as I also don't want to lie to all of you and make everyone think I am some kind superior dieter who breezes through dieting and loses weight without any setbacks. People will go through difficult struggles/stages when dieting, and through life in general, and that's just obviously what is going on with me right now. I just can't seem to get out of this rut. :( But I won't stop trying.


But anyway, on a nicer note: here is a very delicious recipe I tried about a week or so ago. It's a very tasty, very flavourful and a very colourful dish which everyone will enjoy - a Quorn paella. Meat and fish-free too, so also suitable for vegetarians! I tried my first ever paella (a seafood one) when I went to Mallorca in March, with college, and it was sooo good! Since then I had been wanting to make one at home. So I've finally got round to doing it. I am so happy with how it turned out. :)

This recipe serves 4 people and each serving is 450 kcals.

Ingredients:
- 2 tbsp oil
- 1 brown onion, sliced thinly
- 1 red pepper, deseeded and sliced
- 1 yellow pepper, deseeded and sliced
- 200g fine green beans, chopped
- 2 garlic cloves, crushed
- 2 tsp paprika
- 1/2 tsp saffron
- 1 tsp mild chilli powder
- 250g long grain rice (uncooked)
- 1 green/vegetable Oxo cube (dissolved into 900ml hot water)
- 100g (1 whole pack) Quorn chorizo style slices
- 200g Quorn chicken style pieces
- 400g fresh tomatoes, skinned and chopped
- 200g garden peas
- 3 tbsp fresh flat-leaf parsley, to garnish (optional)

Method:

1. In a large frying pan, heat up 1 tbsp of the oil and cook the onions, both peppers and green beans for about 3 minutes.

2. Add in the garlic, paprika, saffron and chilli powder into the pan, give it all a good stir and cook for another 2 minutes.

3. Stir in the vegetable stock (the dissolved Oxo cube) and all of the uncooked rice and cover up with a lid. If you do not have a lid of the correct size, carefully cover the pan with tin foil. Simmer the contents for 20 minutes, stirring frequently.

4. Meanwhile, in a separate frying pan, heat the remaining 1 tbsp of oil and fry the Quorn chicken style pieces for about 2-3 minutes until they go golden.

5. After the 20 minutes of simmering, add the Quorn chicken style pieces, the Quorn chorizo style slices, the tomato and peas into the rice mixture and reduce the heat. Cook this for a further 5 minutes.

6. Remove the pan from the heat and share the paella equally between 4 bowls/plates (or between less bowls if you're feeling extra hungry - if you shared it between 3 plates, it would only be 600 kcal per serving, so not too bad considering). Garnish with the fresh parsley and serve.


P.S. Feels so good to do a blog post again. I have missed it. Sorry again for the lack of posts. I'll try not to leave it as long next time. <3

Thursday, 5 December 2013

Healthy pumpkin spice porridge.


I was inspired to try make a pumpkin porridge after making a very delicious pumpkin pie a couple days ago. I made the pumpkin pie for 'Diversity Week' at college - I was in charge of the USA table and decided to make the pie as it was Thanksgiving the day after the event. Anyways, the porridge didn't taste as sweet as I expected it to, but I think that's because I should have added some brown sugar into the spice mix I created, to give it some sweetness - will definitely do this next time I make it (added it into the recipe, although I didn't do it myself)! I enjoyed my pumpkin spice porridge with a "Nescafé Gingerbread Latte" - yuuuuuum! :)

Ingredients:
- 150ml water
- 150ml almond milk
- 30g oats
- 70g tinned pumpkin purée
- 1 tsp brown sugar
- 1/4 tsp ground cinnamon
- 1/8 tsp ground cloves
- 1/8 tsp ground nutmeg
- 1/8 tsp ground ginger
- agave syrup, golden syrup, brown sugar or granulated sweetener to taste

Method:
1. Pour the water and milk into a saucepan and place on a high heat.


2. Meanwhile, create your spice mix by combining the brown sugar, cinnamon, cloves, nutmeg and ginger together in a little bowl.


3. Once the water/milk is boiling, add in the oats, pumpkin, spice mix and cook until the oats are cooked (approx. 10 minutes).


4. Pour into a bowl and top with the agave syrup, golden syrup, brown sugar or granulated sweetener to taste (I used agave syrup).

Monday, 19 August 2013

Banana coffee smoothie.

 As you know from previous recipes, I love a good smoothie for breakfast in the mornings. I also love sipping a coffee or two in the mornings too. Yesterday whilst making my smoothie, I thought why not just combine the two? And I'm glad I did, as it was absolutely delicious! I just wish I used a little more ice cubes or used a frozen banana to make it even colder. I used half a cup of my favourite instant coffee inside of my smoothie, which is Douwe Egberts The Flavour Collective, Enticing Chocolate flavour. It smells very chocolaty and has a subtle chocolaty taste. Although it's chocolate flavoured, each cup, black, is only about 2 calories! You could use any instant coffee though, it'd be just as delicious.

Ingredients:
- 200ml unsweetened almond milk
- 1/2 cup of your favourite instant coffee, black
- 1 banana, fresh or frozen
- 1 tbsp low-fat peanut butter
- Big handful of ice cubes

Method:
1. Place the almond milk, coffee, banana and peanut butter into the blender. Whizz until smooth and well combined.
2. Now add in the ice cubes and blend again, until smooth. Pour into a pint glass and enjoy!

Wednesday, 31 July 2013

My homemade tangy salsa.

This salsa was just thrown together whilst experimenting and just happened to taste delicious! Experimenting seems to be working very well for me lately, especially when it comes to my cooking (both for my blog and Pie Magazine). This is a lovely chunky salsa with a tangy taste and is very simple to make. Great for spreading in sandwiches, wraps or burgers or piled high on nachos or crispbreads! I naughtily ate the leftovers on its own, as my Mum and sister both aren't very keen on avocado and I had no one else to share it with, but it's not very calorific, so I indulged guilt-free!

This salsa is approx. 150 kcal for all of it! If you share it, just divide 150 by however many people you share it amongst.

Ingredients:

- 1/2 a small-medium avocado
- 1/2 a red pepper
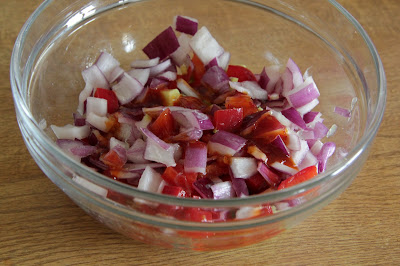
- 1/2 a medium red onion
 - juice of 1/2 a lime
- generous squeeze of ready-made sweet chilli sauce

Method:

1. Firstly peel the skin off of the avocado. Now dice the avocado, red pepper and red onion and then mix it all together in a bowl.

2. Now squeeze in the fresh lime juice and the squirt of sweet chilli sauce. Mix it all together so it's all nicely coated in the sauce and it's all quite shiny looking. Leave to sit for 10 or so minutes to let the flavours soak a bit, and then you have your chunky, tangy salsa ready to eat!

I spread my salsa into a wholemeal wrap with some Quorn 'roast style sliced fillets'. Very quick and easy and extremely tasty and filling! Great for a light, summery lunch.

Friday, 19 July 2013

Homemade gooseberry jam.


Using the gooseberries I picked at Bake Farm (click here for blog post), I decided to use part of my day off to make some gooseberry jam. I have never made any kind of preserve before, so this was very new to me. It was so much simpler than I ever imagined. I thought you'd need lots of fancy equipment, but I was wrong. Do you own an empty jar, funnel, saucepan, saucers, cooker and a wooden spoon? Yes? Well you can make this jam!


This recipe makes about 1 jar of jam. Each tablespoon of this jam is approx. 50 kcal.

Ingredients:
- 320g gooseberries, 
- 320g granulated sugar
- juice of 1/3 of a lemon
- 200ml water

Method:


1. Although this recipe fills about one jar completely, I would sterilize two, just in case. To sterilize the jars and their lids, wash them with hot, soapy water and then rinse them off with very hot water. Now place them on a tray lined with baking paper and put into a cold oven. Once in, turn the oven on to 120°c. Place two saucers in the freezer, which you'll use to test the jam later.


2.  In a medium saucepan on a high heat, put the gooseberries, water and lemon juice in and bring to the boil. Once boiling, turn the heat down and simmer for 10-15 minutes until it turns pulpy.


3. Now, on a very low heat, pour in all of the sugar and stir until it dissolves completely. Once dissolved, turn the heat up high and bring to a hard boil. Boil for about 7 minutes. The jam mixture should start to turn a reddy/pinky colour.


4. To test if the jam is ready, take out one of the chilled saucers and put a little blob of the jam mixture onto it. Leave it to cool slightly. Run your finger through it, if it wrinkles, it's ready. If it doesn't, boil the mixture for a further 3-5 minutes and test again. Keep repeating this until it's ready.


5. Take the jars out of oven and leave to cool slightly. Using the funnel, pour the jam mixture from the saucepan into the sterilized jar(s). I managed to only fill one jar perfectly to the top. Remove the funnel and screw the lid on tight and leave to cool overnight. This jam should keep for about 6 months.

Enjoy your yummy, sweet, homemade gooseberry jam spread on toast, ricecakes or crackers. :)

Monday, 15 July 2013

Trip to Bake Farm & smoothie recipe!


Last Monday, my best friend, Emily, and I went fruit picking together at Bake Farm. I had never heard of this little place before, but Emily goes quite regularly and I asked if she'd come with me one day. The weather was perfect - nice and hot. It's such a beautiful, peaceful place, tucked away from busy main roads and houses. There are rows upon rows of strawberry plants and sooo many different varieties of strawberries to pick from! There's also gooseberries and raspberries to pick too (there's a couple other plants too, blueberries and runner beans I think, but they weren't ready for picking quite yet). It is surprisingly cheap. Coming to the till, I was expecting the fruit I picked to cost at least £10 or more... I picked a whole punnet of strawberries (mixed varieties) and about half a punnet each of raspberries and gooseberries for under £8! I will definitely be getting all of my strawberries and raspberries from here in the future - they are just too delicious to go anywhere else for them now! I have made mini lunchbox fruit salads and smoothies from the strawberries and raspberries (plus a few other ingredients from elsewhere), and I'll hopefully be making either some jam or maybe a tart with the gooseberries, if I get time to do it.


Here's the recipe for one of the smoothies I've made using the fruit I picked. I've called it 'Bake Farm Smoothie':

This recipe makes 1 smoothie (roughly a pint glass worth) at approx. 250 kcal.

Ingredients:
- 200ml almond milk
- 1 banana
- 80g strawberries
- 35g raspberries
- 25g porridge oats
- handful of icecubes

Method:
1. Put the almond milk, banana, strawberries, raspberries and porridge oats into the blender. Blend until smooth.
2. Now put all of the icecubes in and blend again until smooth. Pour into a glass, serve immediately and enjoy!


I made another smoothie, very similar to this one, using more of the strawberries and raspberries I picked from Bake Farm. I used the same recipe as above, but I removed all of the porridge oats and added in 1 small avocado. It was delicious, very smooth and creamy! Just in case you want to give this a go, this smoothie serves 1 (roughly a pint glass worth) and is approx. 300 kcal.

Saturday, 22 June 2013

Portobello mushroom pizzas.


This is a little recipe of mine that I have been experimenting with over the past 2 weeks, chopping and changing and trying to improve the taste each time I make it. As I may have mentioned before, I LOVE pizza. It's my takeaway of choice. A big, fat cheese pizza with a BBQ sauce base is normally my choice, but I also love a good cheesy tuna topped pizza. Every now and again it is good to treat yourself to little naughty foods, such as pizza. But it's very easy to let it get out of control. Moderation is key. But you can remake a much healthier version of your favourite pizza at home. Replace the doughy base for portobello mushrooms! Simple as that. It may sound a bit small compared to the size of a regular takeaway pizza, and it is, but it really does make up for it in taste, and can be surprisingly filling too. I chose to remake my much loved cheesy tuna topping for my portobello mushroom pizzas, and here's what I did:

This recipe serves 4 people, approx. 75 kcal per mushroom pizza.

Ingredients:
- 4 large portobello mushrooms
- 2 salad tomatoes, diced
- 1/4 (approx. 40g) red pepper, finely diced
- 1/4 (approx. 25g) red onion, finely diced
- 1/2 a 140g tin of tuna chunks in brine, drained and flaked up
- 30g "lighter"/low-fat cheddar cheese, grated
- 1/2 tbsp virgin olive oil, for drizzling (optional)

After placing the toppings on the mushrooms, you may find you won't need to use all of the toppings. Don't worry! I didn't use them all up either. Read at the bottom of this recipe a way that you could use up the leftovers.

If the toppings on this pizza don't take your fancy, you could try these:
You can recreate almost any of your favourite pizza toppings to go on your portobello mushrooms bases. You could top one with diced tomatoes, grated cheddar and mozzarella cheese and, once cooked, add some basil leaves and a little drizzle of extra virgin olive oil on top for a margherita pizza. You could add a little sliced up pepperoni and sausage and a little squeeze of BBQ sauce on top of some diced tomato and grated cheese for a meaty pizza. And of course sliced up ham, pineapple and sweetcorn on top of diced tomato and grated cheese for a Hawaiian pizza. Get creative & see what other tasty pizza toppings you can come up with!

Method:

1. Preheat the grill to 180°c. Prep a suitable tray with foil (as the mushrooms will produce a watery liquid as they cook).


2. Carefully pull out the stalk of the mushroom. This next bit is optional: (I chose to do it as I feel the outside covers over a lot of the centre part, which you need to fill). Peel all of the portobello mushrooms' "skin" off (see photo). Now wash them with some water.


3. Place the mushrooms, cap side facing upwards (see photo), onto the tray and cook under the grill for about 5-7 minutes. Once done, take them out and carefully turn them over, ready to be filled.


4. Now fill them evenly with the tomatoes, as the base layer. Now sprinkle a tiny bit of the cheese and then top with the red pepper and red onion (before putting these on, I mixed them both together - you don't have to do this, but I found it easier). Spread the tuna on top & then finally sprinkle all of the remaining cheese over them. Pat/push down the toppings gently after each layer so that nothing is just balancing on top.


5. Place them under the grill for approx. 10-20 minutes (depending on how well your grill grills, mine's rubbish!), until the cheese is melted/golden and it's piping hot throughout. If using, drizzle a little bit of extra virgin olive oil over the top. Serve immediately with a side salad or some homemade potato chips/wedges.


If you have leftover toppings, as I did, you can use those towards making another delicious meal. I had tuna, tomato and a little bit of onion and pepper left over. So I put it all in a bowl, added a dollop of low-fat mayonnaise and stirred it all together, and now you have a tasty sandwich/wrap filling. I filled mine into a wholemeal wrap, grated over 10g of low-fat cheese, folded it up and stuck it in my health grill for 2 minutes. It was absolutely delicious and the flavours taste great together. The filling also tastes good cold and still tastes nice without the cheese. You could also use it as a jacket potato filling. If you have no tuna leftover, you could use the diced veggies to create a chunky salsa. You could add in a freshly chopped chilli for some heat and maybe some avocado for some taste and texture. Stir it all up together with a little drizzle of extra virgin olive oil.