Saturday, 22 June 2013

Portobello mushroom pizzas.


This is a little recipe of mine that I have been experimenting with over the past 2 weeks, chopping and changing and trying to improve the taste each time I make it. As I may have mentioned before, I LOVE pizza. It's my takeaway of choice. A big, fat cheese pizza with a BBQ sauce base is normally my choice, but I also love a good cheesy tuna topped pizza. Every now and again it is good to treat yourself to little naughty foods, such as pizza. But it's very easy to let it get out of control. Moderation is key. But you can remake a much healthier version of your favourite pizza at home. Replace the doughy base for portobello mushrooms! Simple as that. It may sound a bit small compared to the size of a regular takeaway pizza, and it is, but it really does make up for it in taste, and can be surprisingly filling too. I chose to remake my much loved cheesy tuna topping for my portobello mushroom pizzas, and here's what I did:

This recipe serves 4 people, approx. 75 kcal per mushroom pizza.

Ingredients:
- 4 large portobello mushrooms
- 2 salad tomatoes, diced
- 1/4 (approx. 40g) red pepper, finely diced
- 1/4 (approx. 25g) red onion, finely diced
- 1/2 a 140g tin of tuna chunks in brine, drained and flaked up
- 30g "lighter"/low-fat cheddar cheese, grated
- 1/2 tbsp virgin olive oil, for drizzling (optional)

After placing the toppings on the mushrooms, you may find you won't need to use all of the toppings. Don't worry! I didn't use them all up either. Read at the bottom of this recipe a way that you could use up the leftovers.

If the toppings on this pizza don't take your fancy, you could try these:
You can recreate almost any of your favourite pizza toppings to go on your portobello mushrooms bases. You could top one with diced tomatoes, grated cheddar and mozzarella cheese and, once cooked, add some basil leaves and a little drizzle of extra virgin olive oil on top for a margherita pizza. You could add a little sliced up pepperoni and sausage and a little squeeze of BBQ sauce on top of some diced tomato and grated cheese for a meaty pizza. And of course sliced up ham, pineapple and sweetcorn on top of diced tomato and grated cheese for a Hawaiian pizza. Get creative & see what other tasty pizza toppings you can come up with!

Method:

1. Preheat the grill to 180°c. Prep a suitable tray with foil (as the mushrooms will produce a watery liquid as they cook).


2. Carefully pull out the stalk of the mushroom. This next bit is optional: (I chose to do it as I feel the outside covers over a lot of the centre part, which you need to fill). Peel all of the portobello mushrooms' "skin" off (see photo). Now wash them with some water.


3. Place the mushrooms, cap side facing upwards (see photo), onto the tray and cook under the grill for about 5-7 minutes. Once done, take them out and carefully turn them over, ready to be filled.


4. Now fill them evenly with the tomatoes, as the base layer. Now sprinkle a tiny bit of the cheese and then top with the red pepper and red onion (before putting these on, I mixed them both together - you don't have to do this, but I found it easier). Spread the tuna on top & then finally sprinkle all of the remaining cheese over them. Pat/push down the toppings gently after each layer so that nothing is just balancing on top.


5. Place them under the grill for approx. 10-20 minutes (depending on how well your grill grills, mine's rubbish!), until the cheese is melted/golden and it's piping hot throughout. If using, drizzle a little bit of extra virgin olive oil over the top. Serve immediately with a side salad or some homemade potato chips/wedges.


If you have leftover toppings, as I did, you can use those towards making another delicious meal. I had tuna, tomato and a little bit of onion and pepper left over. So I put it all in a bowl, added a dollop of low-fat mayonnaise and stirred it all together, and now you have a tasty sandwich/wrap filling. I filled mine into a wholemeal wrap, grated over 10g of low-fat cheese, folded it up and stuck it in my health grill for 2 minutes. It was absolutely delicious and the flavours taste great together. The filling also tastes good cold and still tastes nice without the cheese. You could also use it as a jacket potato filling. If you have no tuna leftover, you could use the diced veggies to create a chunky salsa. You could add in a freshly chopped chilli for some heat and maybe some avocado for some taste and texture. Stir it all up together with a little drizzle of extra virgin olive oil.

Wednesday, 5 June 2013

Homemade Quorn enchiladas.


These enchiladas were originally created by just experimenting with random ingredients I had in my cupboards. This isn't my first attempt at creating enchiladas from scratch. I've tried once previously, but I only made it a single serving. As I loved my first creation so much, I made it again but altered the recipe slightly to enhance the flavours. Originally I didn't include pepper, chilli, paprika or cayenne pepper into it. Considering I never looked up any recipe and have never made or even seen a homemade enchilada before, it turned out amazingly.

My best friend, Emily, came over for the afternoon so I thought it would be a great excuse to attempt to create the same dish all over again, but "family-sized" (and of course, her stirring-skills were a great help to me as I prepped the ingredients as I went along - not recommended, as if you don't have the extra help, this can be rather time consuming!). The dish went down a hit with everyone, and they've all requested that I make this dish for them on a regular basis, which feels great to hear!

If you prefer your real meat to your meat substitute, just replace the Quorn/vegetarian mince with real mince. I assume you'd cook it the same way, but don't quote me on that as I have next to no experience cooking with meat (apart from my recent recipe for "Homemade lean beef burgers", of course).

Serves 4 people (approx. 460 kcal per serving) if you're giving two enchiladas per person, or serves 8 people (approx. 230 kcal per person) if you're giving one enchilada per person.

Ingredients:
- Low-kcal cooking spray
- 300g frozen Quorn/vegetarian mince
- 1 x 400g tin of chopped tomatoes
- 1 x carton of tomato passata
- 3 x garlic cloves, crushed
- 1 x brown onion, diced
- 1.5 x red peppers, diced
- 1 x red chilli, finely chopped
- 1 x dash of paprika
- 1 x dash of cayenne pepper
- 1 x tbsp tomato ketchup
- Freshly ground salt and pepper, to taste
- 2 x dash of Worcestershire sauce
- 8 x medium soft wholemeal tortilla wraps
- 80g lighter/low-fat cheddar cheese, grated

Method:
1. Preheat the oven to about 200°c. Prep a large rectangular oven-proof dish by spraying it well with low-kcal cooking spray.

2. In a medium sauce pan on a medium-high heat, pour in the frozen Quorn mince and brown it off. Now pour in half of the chopped tomatoes and half of the tomato passata and add in 3/4 of the onion, all 3 garlic cloves and 1 pepper. Stir well and cook for approx. 10 minutes.

3. Stir in the paprika, cayenne pepper, a dash of Worcestershire sauce, ketchup and seasoning and cook for a further 2 minutes.

4. Now separate the mince mixture between the 8 tortilla wraps as evenly as possible. Place them side by side, with the overlapped sides of the tortilla wraps facing downwards to keep them closed.

5. In a medium bowl or saucepan, pour in the remaining chopped tomatoes, tomato passata, onion, red pepper and a dash of Worcestershire sauce and stir together well.

6. Pour this tomato mixture evenly along the middle of the tortilla wraps, trying to keep both ends of the tortilla wraps exposed. Sprinkle the grated cheese evenly all over the top of the sauce.

7. Place the dish into the middle of the preheated oven and leave to cook for 30 minutes, until it's piping hot throughout, the exposed ends of the tortilla wraps have crisped up and the cheese has melted and has turned a lovely golden colour. Try not to burn it!

8. Serve immediately. You can serve either two enchiladas per person, or just one per person, plus something nice extra on the side, such as Mexican style rice, nachos with dip(s)/cheese or some vegetables.


P.S. Just so you know, I won't be posting at all for the next week or so, as I'm jetting off to sunny Magaluf! I managed to lose 5 lbs in about 2/3 weeks, but knowing the nature of this type of holiday (booze and fatty foods) I'll probably put it all back on and more, and will have to start back at square 1 when I return). I will be sure to post about my holiday when I get back, and I already have a new recipe in mind to create and post about when I get back too, so keep your eyes peeled! Have a lovely week everybody. :)

Wednesday, 29 May 2013

I'm Pie Magazine's "Recipe Guru".

I'm not sure if many of you are aware, but since March 2013, I have been writing once a month for a great young people's e-magazine called Pie Magazine. I went to school with the founder of Pie Magazine, Benjamin Franks. He is an extremely talented writer and very creative and I am honoured that he has given me this opportunity to write regularly for Pie. I remember buying the first ever issue of Pie back in school (originally a paper copy). I loved reading it, and never imagined that I would one day be a part of it.

I am Pie's "Senior Recipe Writer/Guru" and I write recipes which are mainly naughty, calorific baking recipes. I decided to write these types of recipes because I really enjoy baking and sharing them with family and friends and then receiving their feedback on what I've made. I used to bake very often, but since dieting/calorie counting, I haven't been able to do it as often as I use to as it seems to really effect my waistline. So being able to do it once a month, for a good purpose, is great fun! So I keep my naughtier recipes for Pie and my healthier recipes for my blog. So far I have written 4 recipes for Pie which are online and ready to read (click on the thumbnails below to check them out). I have also submitted a savoury recipe for Pie's upcoming annual for 2013, but what I've made will remain a secret until it's published. I was shocked but ecstatic to discover that my Classic Shortbread recipe was the most read article of April 2013. It feels great knowing that people are actually reading what I've created. So if you want to have a peek at what I write, besides what is on my blog, feel free! And remember, there's a new recipe every month, so keep checking back regularly for more! I hope you enjoy reading it as much as I enjoy making/writing it. :)

My recipes for Pie:


There's also many other topics to read about on Pie too besides my recipes, including poetry, short stories, news, travel, games, music, films, books, reviews, etc. all well written by Pie's very talented writers. So if you have a few spare minutes take a look!

Thursday, 23 May 2013

Doing the 30 day squat challenge.

I have heard so much about this "30 Day Squat Challenge" lately, especially on Facebook, that I have decided to give it a go for myself. I am now on day 13 out of 30. Why have I decided to join everyone else and put myself through this leg-and-bum-torture? Because my boyfriend, Jago, & I have booked a last minute holiday and we leave in just 13 days! We're going to Mallorca Rocks, Magaluf, for a week and I am battling for my bikini body back, which I had last year when I went to Turkey (click here for the blog post). As I haven't been able to attend the gym lately (recent health issues), I need something to make me feel like I'm working out and making an effort. I'm aware that I'll only get to day 26 before actually leaving for our holiday, but that isn't going to stop me. Ideally I'd like to be at the same weight as I was before I went to Turkey, but the likelihood is that's a bit unrealistic with the amount of time I've got to do it, but that won't stop me trying my hardest!


Here's a scan of my notepad with the whole challenge written out. I need to write it out myself rather than continuously keep looking up for it online each day, otherwise I probably won't do it. The first 3 days were by far the most painful. By Day 3, stairs were out of the question! I'm quite shocked at how much it actually raises your heart rate and how sweaty you get just by doing squats! From Day 5 onwards, I actually have to stop for a few seconds between every 10-20 squats as I just get so hot and bothered I can't seem to push myself up from the bottom of the squat, haha.

I didn't take a before photo, so I don't know how I'll be able to compare any real difference. I'm just going to have to try and take a photo of how it looks now (at Day 13), and then take one when it's over and see if there's any noticeable change. I'll post the results at the end of the challenge. If there is a noticeable difference, I may give myself a bit of a break and then restart the challenge all over again from the beginning.


Follow my blog with Bloglovin

Sunday, 12 May 2013

Graze's 'Good Breakfast Club' (plus FREE code).

I was pleasantly surprised after checking my emails the other day, as I received a code from Graze, inviting me to their 'Good Breakfast Club'! I have been on their waiting list for what feels like ages, and now I'm finally in the club! :) To add to the nice surprise, my first delivery was free!


I tried my first porridge from Graze yesterday. It was the blackcurrant & cranberry porridge with honey and it was absolutely delicious! I've never had honey in porridge before, as I'm not overly keen on honey, but it was really nice and really complimented the flavour of the porridge.  If you have a sweet tooth, this would be perfect for you as the honey makes it VERY sweet. There isn't a lot of porridge once it's all made up, but the tastes definitely makes up for the lack of food! The bigger porridge punnets would probably make a more satisfying amount of porridge, but it doesn't come with honey. I am quite tempted to keep paying to receive these. I'm probably going to have to move around how often I receive both of the different Graze boxes though, otherwise I am going to be so poor!

The porridge is really simple to make. The instructions are in the leaflet you receive with them, but in case you misplace it, all you do is:

1. Pull the lid off the top of the oats (keep the lid sealed over the honey if you can) and pour the oats into a bowl.
2. Fill up the part of the punnet that had the oats in one and a half times with your choice of milk (I used Alrpo unsweetened almond milk), and pour into the bowl with the oats. If you're having the bigger punnet of porridge, without the honey on the side, fill it up twice with your choice of milk and pour it in.
3. Now pop it in the microwave for 2 minutes.
4. Take it out and give it a stir. If you're going to use the honey, just take the lid off of the honey, and pour as much as you want of it into the porridge and give it a good stir.

Simple as that!

You can only join the Good Breakfast Club if you're an existing Graze customer. But don't worry, I have codes for everyone:

If you're already a Graze customer, here's a code to get your first Good Breakfast Club box for FREE:

ZL5YKHL


If you're not already a Graze customer, get yourself your first regular Graze box for FREE by using this code:

N6JMVCHD


You need to live in the UK to be able to receive Graze Boxes. When you sign up they do ask for payment details - don't panic! This is only in case you decide to continue to receive boxes after you get your free one. If you only want the free box and no more or if you receive your first box and decide you really don't like Graze, cancelling with them is very simple and fuss free - it's a very trustworthy site and I know people who have cancelled with them before with no issues whatsoever. If you do continue to receive them, you can decide how often you receive boxes. You can also book holidays so they don't come on a week you know you won't be there for and you can also postpone boxes too. Don't forget to go through all of the punnets/porridges on their website and rate all of them with either 'Try', 'Like', 'Love' or 'Bin' and you can also select 'Send Soon'. 'Bin' insures that you will never receive that punnet - great if your allergic to anything, have specially dietary needs or just know you don't like a certain food, like me with coconut. This can be a little time consuming, but it's worth doing, especially if you're planning to continue to pay for boxes.

TOP TIP: As the amount of calories in each punnet and it's use-by date is written on the separate leaflet in the box and not on the punnets themselves, use a permanent marker to write them onto the lid of the punnets yourself. That way you don't need to carry the leaflet around with you everywhere and you don't need to worry about losing it.

Monday, 6 May 2013

Red onion marmalade.

For our barbecue the other day, my boyfriend, Jago, treated us all to his homemade red onion marmalade. It tasted gorgeous! We all had a dollop of it on our burgers (and I kept sneakily having some on its own, as I just loved it that much) and it went so well! It could also go on crispbreads, crackers, on toast or in sandwiches. Jago has kindly let me feature his recipe on here! It may not be the healthiest of recipes, but as long as you don't indulge in too much of it, it shouldn't be too bad. Its very sweet and really hits the spot if you're craving a little sugar. Sorry I don't have any photos throughout the making of this little delight - I was distracted getting the rest of the food ready. If we make it again, I'll snap some step-by-step pics and edit them into this post. :)


I'm not too sure how many servings this recipe makes. But the whole recipe itself is 459 kcal. So I guess if you just divide it all out evenly amongst everyone, then divide 459 by how ever many you divide the marmalade into, it'll give you an approx. amount of calories for your serving. I wouldn't have too much though as it's quite calorific. Sorry for not being overly helpful!

Ingredients:
- 1/2 tbsp oil
- 4 red onions, sliced
- 1 garlic clove, crushed
- 2 tbsp sugar
- juice of 1 orange
- 1 cup of red wine (or enough that it just covers all the tops of the ingredients in the pan).

Method:
1. On a high heat, in a medium saucepan, cook the onions and garlic in the oil until it starts to go soft.
2. Add in the sugar and keep stirring it all around. Cook until it starts to bubble.
3. Add in the orange juice and let it simmer for about 2 minutes.
4. Now pour in the wine, turn down the heat and allow to simmer until it reduces and thickens. It should have a sticky constancy.
5. When ready, pour into a bowl and let it cool down. Once cool, cover it up and keep it in the fridge. Once cold, it's ready to use when you are!

Enjoy! :)

Thursday, 2 May 2013

Homemade lean beef burgers.

The sun has been shining and I decided today was the perfect day to have the first barbecue of 2013! My boyfriend, Jago, and I slaved away to make a healthy feast for my family. This included: homemade beef burgers with all the garnishes; red onion marmalade (this will be posted in the next recipe post I write - keep your eyes peeled); potato salad; tuna pasta salad and carrot sticks with hummus. Obviously as I'm a vegetarian I never got to taste test these burgers (I enjoyed some Quorn chicken style burgers instead), but everyone else had one and they absolutely loved them - they even had seconds! So here it is, my first ever meat recipe for my blog! I hope you all enjoy it. :)

This recipe makes about 5 beef burgers. Each burger, with no garnishes, is approx. 145kcal. Just add the calories for any fillings or roll you eat with your burger to give a total amount, inc. garnishes.

Ingredients:
- 500g extra lean mince beef
- 1/2 red onion
- 2 garlic cloves
- 1 egg
- dash of Worcestershire sauce
- salt and pepper
- low-kcal cooking spray (if pan frying)

Equipment that'd be useful for you to have:
- a burger press
- a garlic crusher

Method:
1. Dice the red onion as small as possible.

2. Place the red onion into a large bowl and crush the garlic cloves into the bowl with it.

3. Add in the mince beef, egg, Worcestershire sauce, salt and pepper into the bowl.

4. Using your hands squish all of the ingredients in the bowl together, work it all in, until thoroughly combined.


5. Now, from the burger meat mixture, weigh out 120g of it and, either using a burger press or your hands, make it into a even, circular burger shape. The last burger you make will probably weigh a bit more than 120g, but that's okay.


6. Now you can cook these on a BBQ or pan fry them, using low-kcal cooking spray or a little bit of olive oil. I chose to cook them on the BBQ.

7. Once cooked through, serve up with all of the garnishes. We served ours with small soft bread rolls, lettuce, tomato, a little bit of low-fat cheese and our homemade red onion marmalade (next recipe to be written for my blog, keep your eyes peeled!) and a little of all the side dishes we made (see photo at the top).

Tuesday, 16 April 2013

Vegetarian chickpea burgers.

Flicking through last month's issue of one of my favourite magazines, Healthy Food Guide (issue April 2012), I came across this recipe and I just had to give it a go (page 40).

Since being a vegetarian, I have found it extremely difficult to find nice tasting veggie burgers. In my opinion, Quorn burgers are horrible and I will never touch them again (although I like almost all other Quorn products). I've tried Tesco's meat-free burgers too and they are equally as disgusting. So I have always kept an eye out for an easy-ish looking veggie burger recipe to try and I have finally found one that has taken my fancy (I have tried making my own experimental bean burgers before - blog post here - but they didn't turn out so good.. Bit of a disaster really..).


These chickpea burgers are really delicious. Mine didn't turn out quite as neat looking as the ones photographed in the magazine, but I don't mind... As long as they taste good, that's all that matters. A couple of them burnt a little (although I couldn't taste any burntness) and others crumbled into pieces, but both my family and I really enjoyed them. They felt like the perfect meal to enjoy on a sunny day like today. They'll also be great for barbecues in the Summertime. The burger looks so appetising when assembled with all the garnishes, and it definitely tastes as good as it looks. The lemon and sweet chilli dressing is incredible. If I were to make these again, I'd definitely make two batches of the dressing as I just want to smother everything in it!

This recipe serves 4 people and is approx. 295 kcal per serving with the garnish, but without a roll(I've not included the roll because you may use different rolls as I've used.. Just add on how many calories 1 roll of your choice is worth to the calories above, which will give you an approx. amount per serving with garnish and your roll of choice). The chickpea burgers on their own are approx. 210 kcal each.

Here's how it's made:

Please note: You will need a food processor for this recipe.

Ingredients:

For the burger/dressing:
- 400g sweet potatoes, peeled and chopped
- 2 tbsp sweet chilli sauce
- 1 tbsp fresh lemon juice
- 1 x 400g tin of chickpeas, drained and rinsed
- 2 spring onions, finely chopped
- 1 tsp ground cumin
- 1/4 tsp dried crushed chilli flakes
- 1 tsp lemon zest
- 2 eggs, beaten
- 2 tbsp flatleaf parsley, chopped
- Low-kcal cooking oil spray

For the garnish:
- 4 x rolls, halved and toasted, if you wish (You can choose whatever rolls you'd prefer. E.g. sourdough, pita bread, wholemeal, soft white, etc. I chose "Warburton's Sandwich Thins" for our burgers, which are 100kcal per Thin).
- 100g spinach
- 1 large tomato, sliced
- 1 small avocado, sliced
- 50g reduced-fat feta/salad cheese, crumbled

Method:


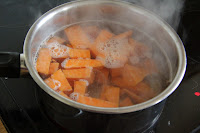
1. Cook the sweet potatoes in a large pan of boiling water for about 8 minutes, or until very tender. Meanwhile, in a small bowl, combine the sweet chilli sauce and lemon juice to create the dressing and set aside.


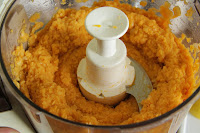
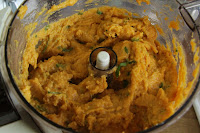
2. Drain the potatoes, then whiz in a food processor with the chickpeas until roughly crushed. Add the spring onions, cumin, chilli flakes and zest and whiz to combine. Gently stir in the eggs and parsley, then divide the mixture into 4 x 10cm patties.


3. Heat a little low-kcal cooking oil spray in a frying pan, then cook the patties over a medium heat for 2-3 minutes on each side until golden and cooked. (Don't worry too much if they fall apart like mine did - they'll be a bit messy but they'll taste just as good).

4. To serve, top the bottom half of each roll with spinach leaves, a chickpea burger, tomato and avocado slices, then the feta/salad cheese. Drizzle over the lemon and sweet chilli dressing, then add the roll tops.

Enjoy! :D